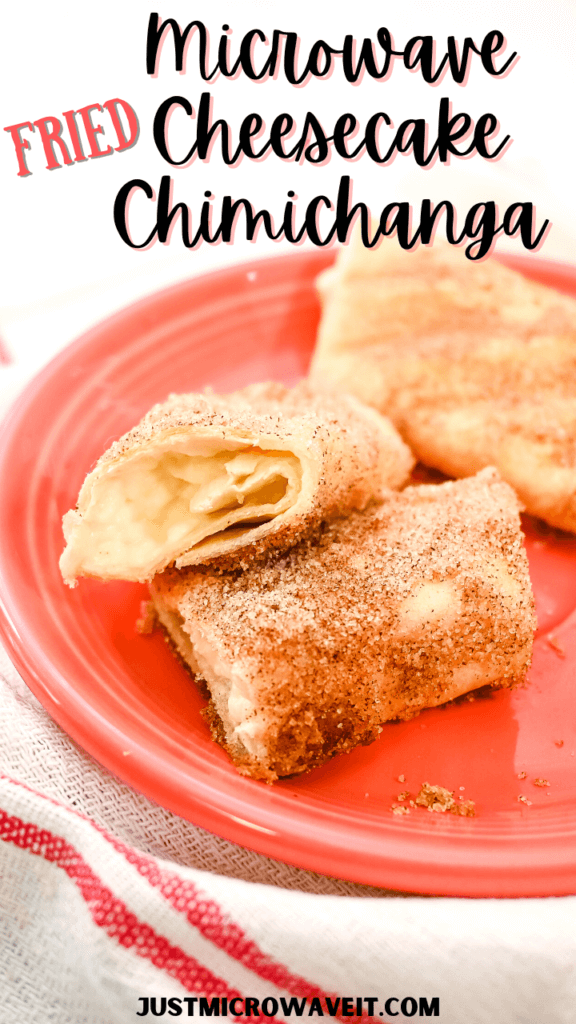
Have you ever had the cheesecake chimichangas from Taco Bueno? We love them, so I figured out how to make Microwave Fried Cheesecake Chimichangas. You are gonna love these. This post contains affiliate links.
You will need to use a Microwave Toaster to get them deliciously fried in the microwave.
Table of Contents
Ingredients to make Microwave Fried Cheesecake Chimichangas

- 8 oz cream cheese
- 1 teaspoon vanilla
- 1/3 cup + 2 tablespoons white sugar
- 1 teaspoon cinnamon
- butter
- 6-8 street taco flour tortillas
This is incredibly easy, and you probably have the ingredients at home. But, there is one caveat, I have not found a way to make these cheesecake chimichangas without using a Microwave Toaster. When I ordered mine, it arrived the next day.
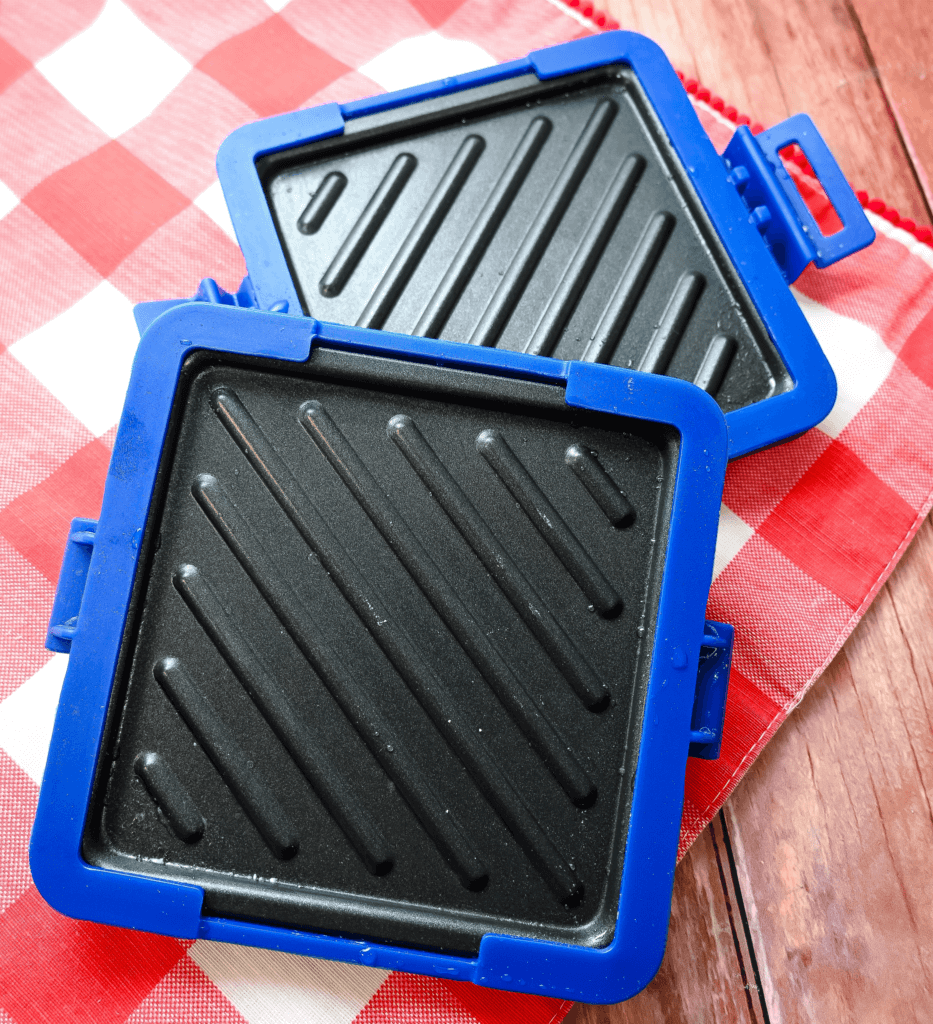
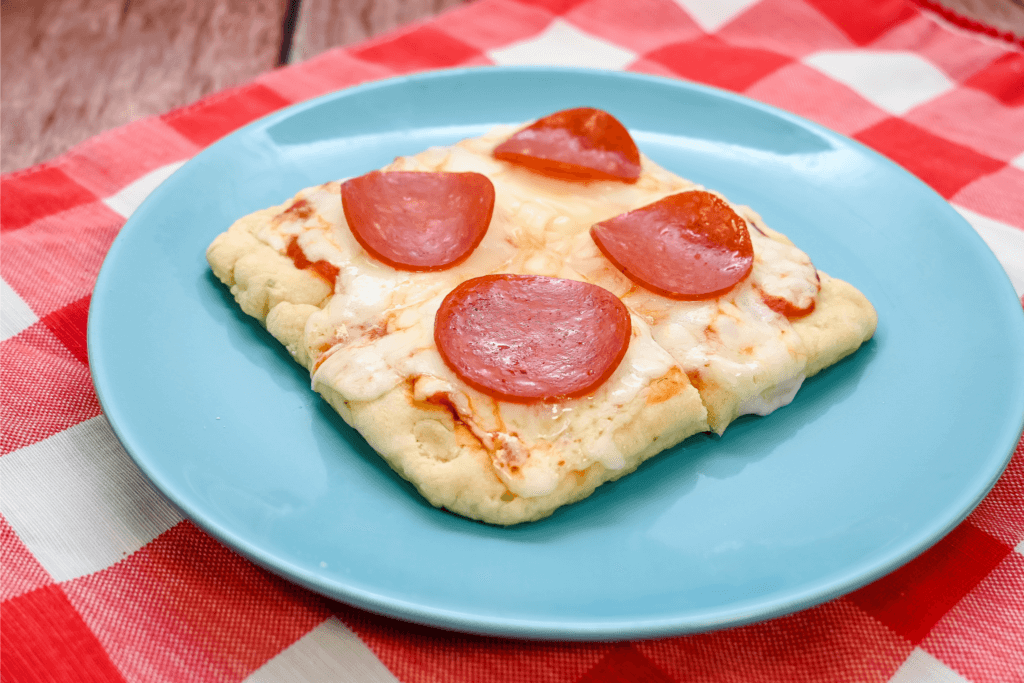
I love this Microwave Toaster because you can remove the plates and wash everything simply in the dishwasher. Then the plates just pop right back in the silicone. And, there are so many things you can make with it, including this Microwave Pizza!
The best thing about this Microwave Toaster is it allows you to crisp up things in the microwave, which is impossible to do without it.
How do you make Fried Cheesecake Chimichangas in the Microwave?
If your cream cheese is still a bit cold and hard and not quite room temperature, microwave it for 20-30 seconds in a microwave-safe dish. This will soften it up pretty quickly.
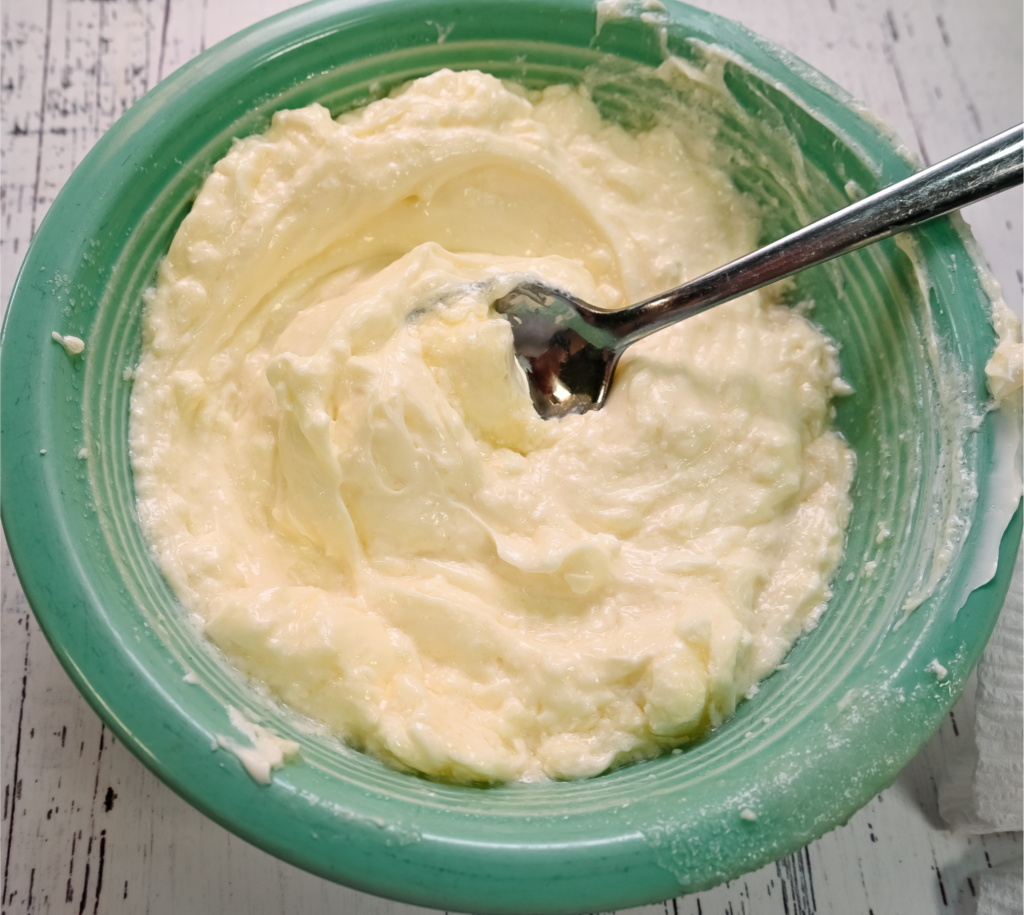
Combine cream cheese, 1/3 cup of white sugar, and vanilla and mix until smooth.
I find the street taco size flour tortillas work best. I make two at a time.
With the microwave toaster, the instructions say don’t use it more than 3 to 4 times without letting it cool completely for 30 minutes. So, I make two cheesecake chimichangas at a time.

Lay out a tortilla, spread about 1 to 1 1/2 tablespoons of the cream cheese mixture in a line in the center.
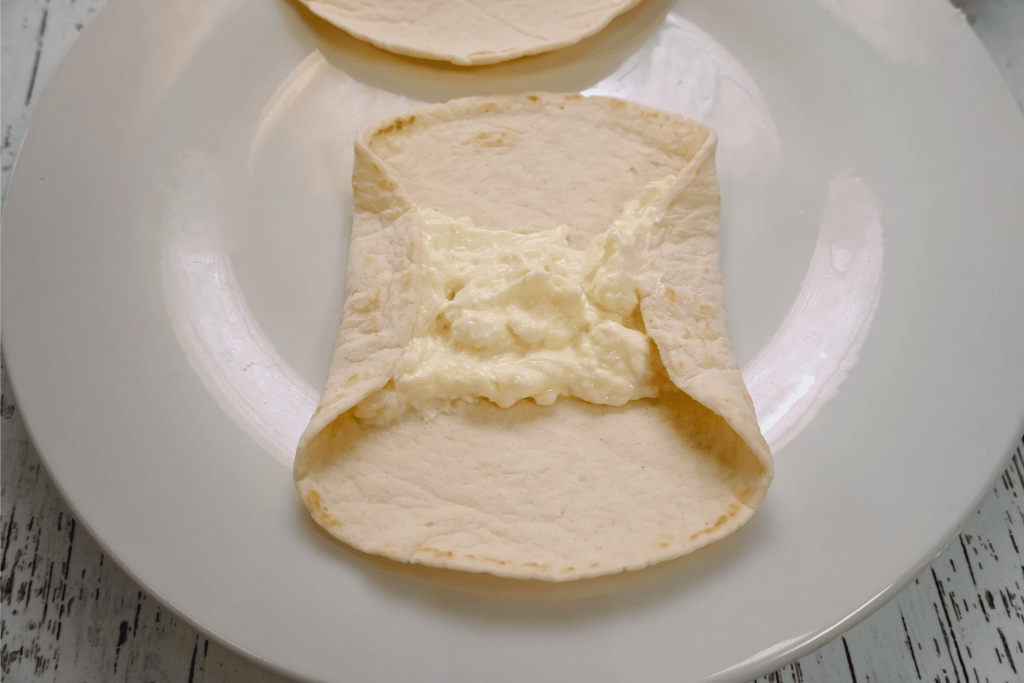
Fold the ends inward.
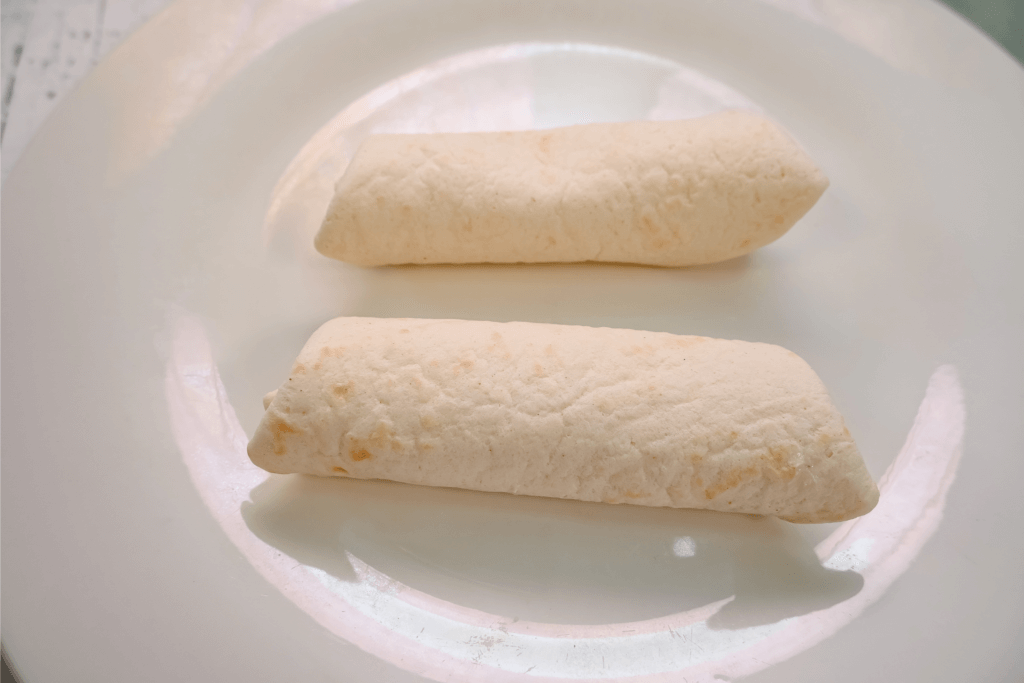
Then, roll the tortilla completely closed, so the cream cheese mixture is completely enclosed and can’t escape. You don’t want it oozing out of the tortillas while it’s cooking.
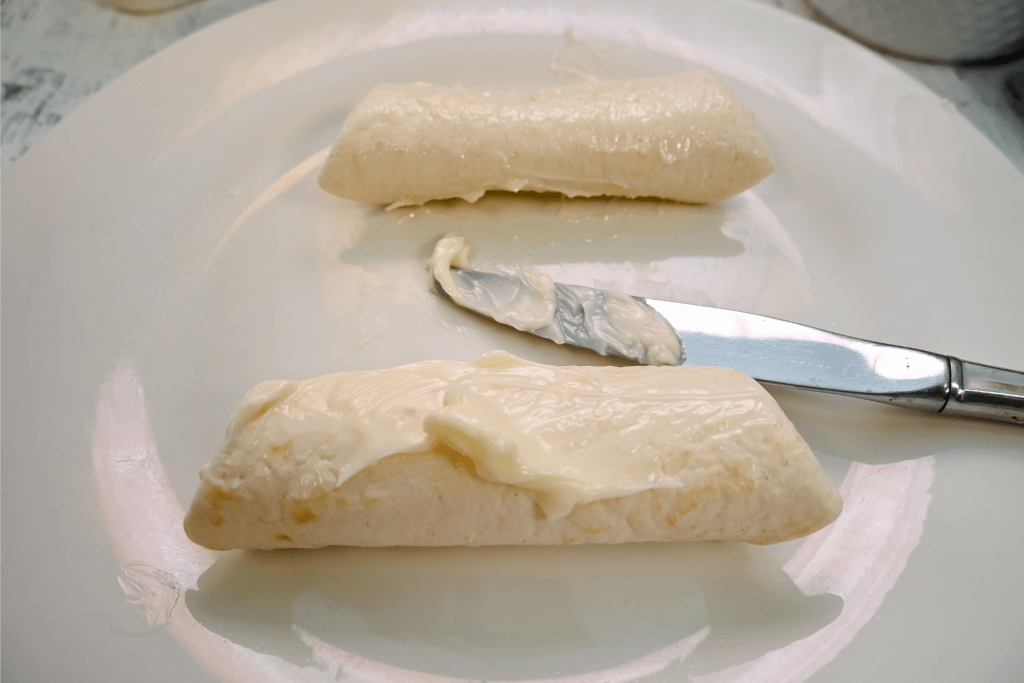
Spread butter over the entire chimichanga.
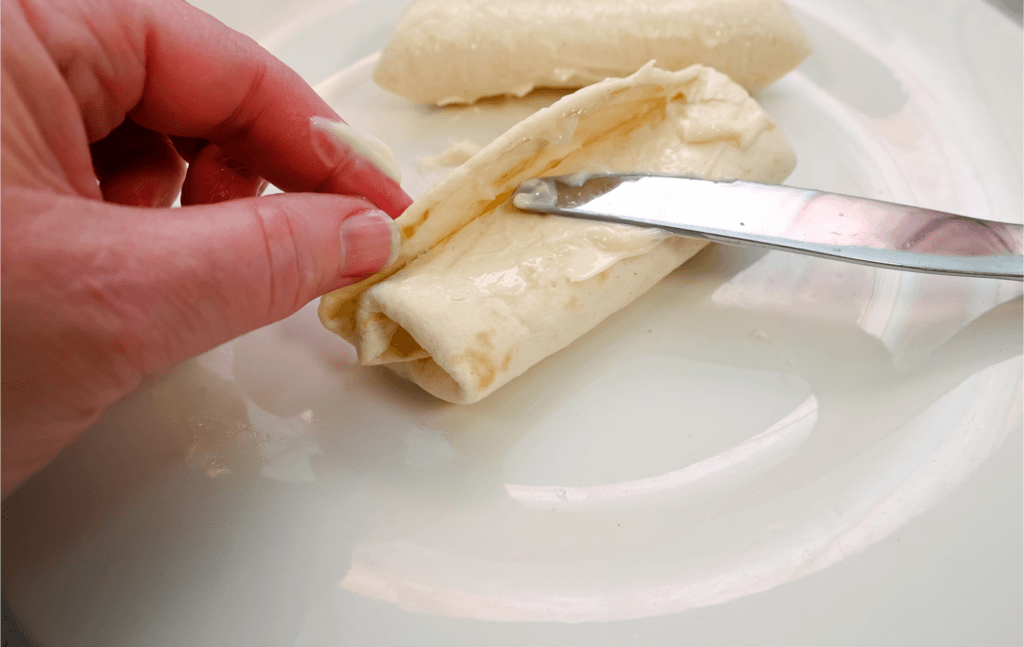
Add a little bit of butter under the tortilla flap to help keep it closed.
Spray the Microwave Toaster with non-stick oil spray on both plates.
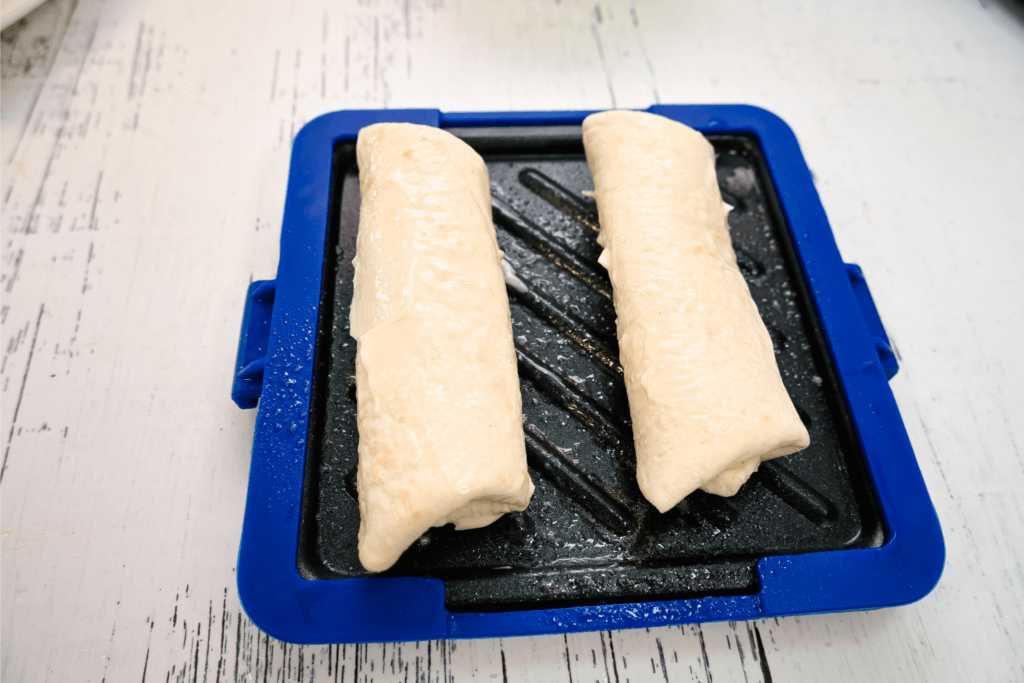
Place the chimichangas into the toaster and close it up.
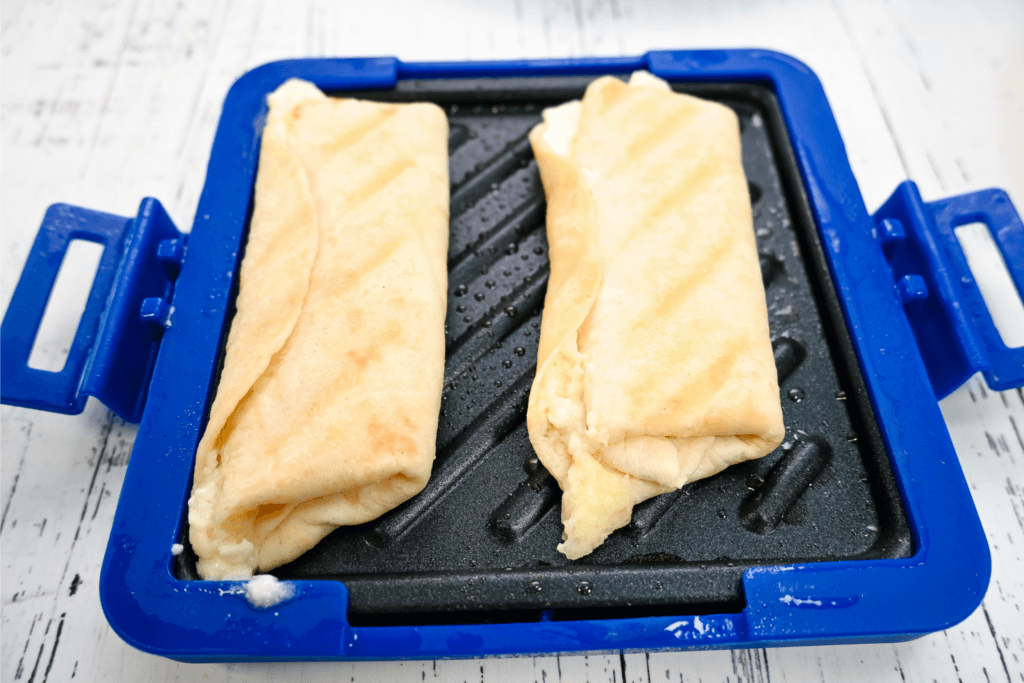
Cook it on HIGH for 1 1/2 minutes. Then, flip it over and cook for 30 more seconds.
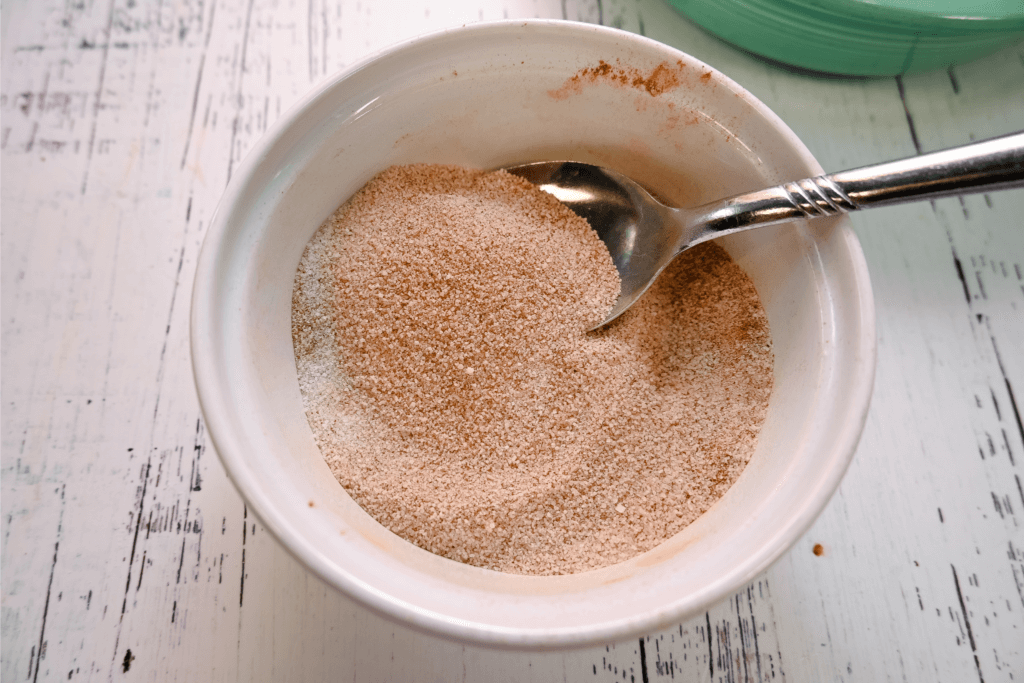
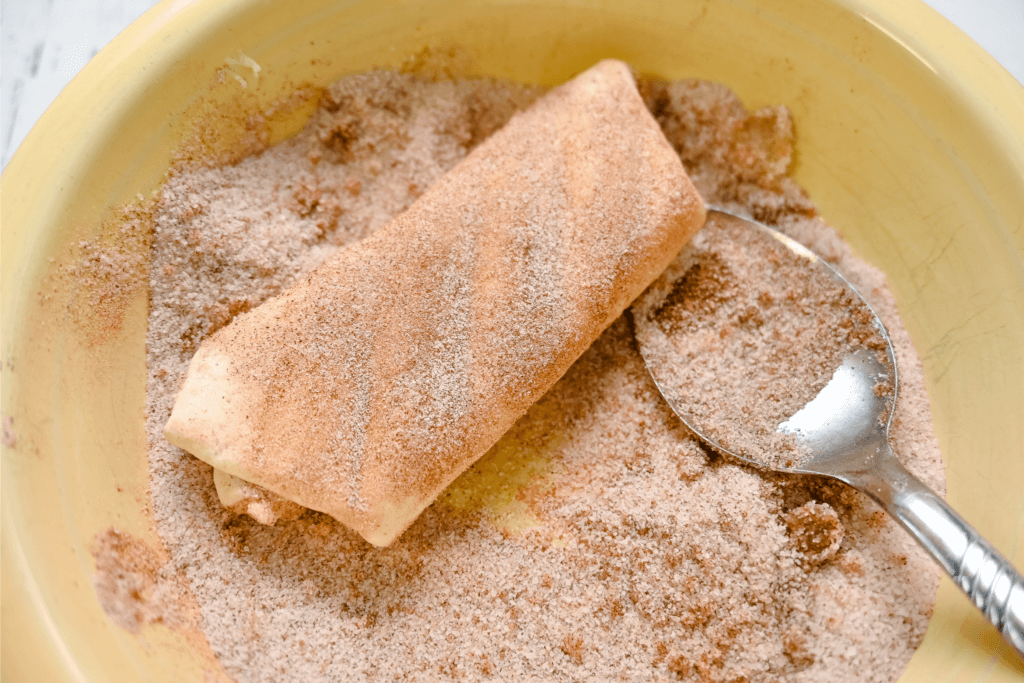
While the cheesecake chimichangas are cooking, mix up the 2 tablespoons of sugar and 1 teaspoon of cinnamon in a bowl large enough to toss the chimichangas in.
Once the microwave is done, let the toaster sit for about 30 seconds before opening.
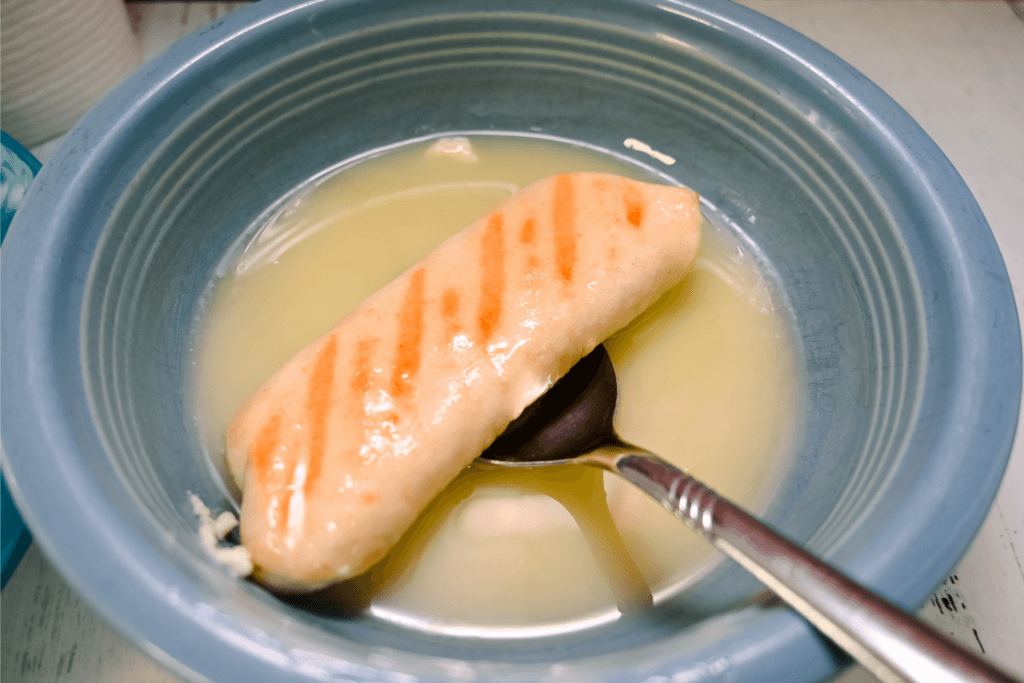
Melt a couple tablespoons of butter in the microwave and dip the cooked cheesecake chimichanga in the butter. This step you can skip as I found it somewhat unnecessary after making a bazillion of these.
If you want a lot of cinnamon and sugar to stick to the chimichanga, you might want to keep this step in the recipe. Otherwise, skip it and just immediately take the chimichanga from the microwave toaster to the cinnamon sugar mixture and toss.
Carefully add the cheesecake chimichangas, one at a time, into the cinnamon sugar mixture and toss to cover.
Serve immediately.
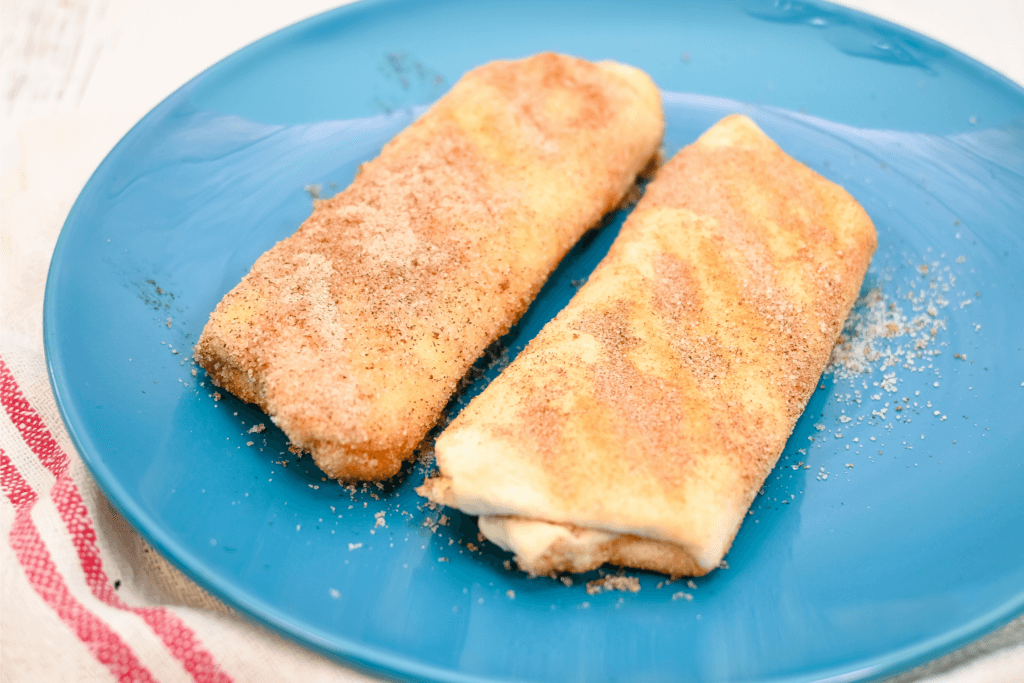
You can eat the cheesecake chimichangas immediately.
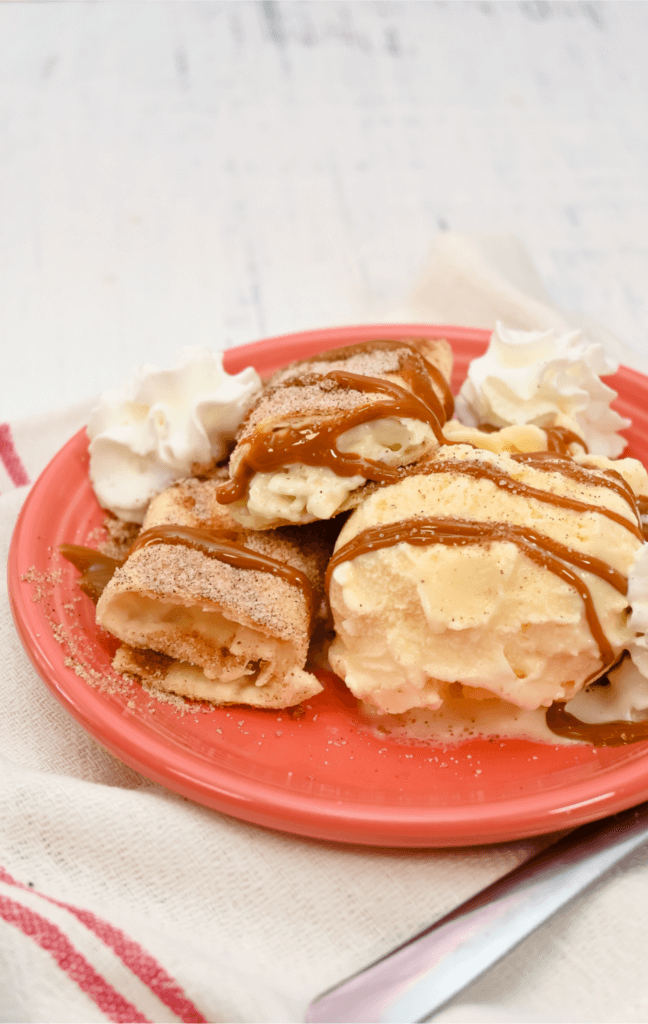
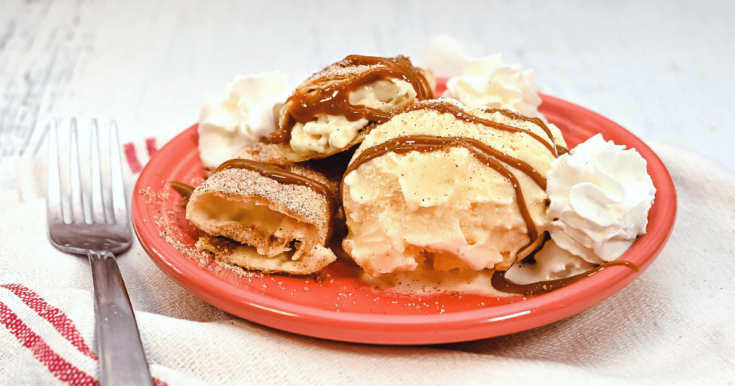
Cheesecake Chimichanga Sundae Dessert
You can make a fancy dessert with a cheesecake chimichanga, a scoop of ice cream, whipped cream, and everything drizzled in dulce de leche sauce.
Add ins for the Cheesecake Mixture
You don’t have to use just straight cheesecake mixture. You can also top your cheesecake mixture with other things before rolling up the tortillas. Here’s a few ideas:
- Nutella
- Strawberries
- Blueberries
- Peach Preserves
- Strawberry Preserves
- Peanut Butter
- Chocolate Chips
- Caramel Sauce
- Chopped Peanut Butter Cups
- Your Favorite Candy Bar, chopped
- Dulce de leche sauce
More Microwave Desserts
- Made from Scratch Brownies in the Microwave!
- How to make No Bake OREO Cookie Marshmallow Bars
- How to make a Microwave Chocolate Cream Pie
- How to make Plain Cheesecake in the Microwave
- How to make Microwave Lemon Bars
- How to Make Microwave Monkey Bread
Microwave Fried Cheesecake Chimichangas
Ingredients
- 8 oz cream cheese
- 1 teaspoon vanilla
- 1/3 cup + 2 tablespoons white sugar
- 1 teaspoon cinnamon
- melted butter
Instructions
- If your cream cheese is still a bit hard and not quite room temperature, microwave it for 20-30 seconds in a microwave-safe dish. This will soften it up pretty quickly.
- Combine cream cheese, 1/3 cup of white sugar, and vanilla and mix until smooth.
- I find the street taco size flour tortillas work best. I make two at a time.
- With the microwave toaster, the instructions say don't use it more than 3 to 4 times without letting it cool completely for 30 minutes. So, I make two cheesecake chimichangas at a time.
- Lay out a tortilla, spread about 1 to 1 1/2 tablespoons of the cream cheese mixture in a line in the center.
- Fold the ends inward.
- Then, roll the tortilla completely closed, so the cream cheese mixture is completely enclosed and can't escape. You don't want it oozing out of the tortillas while it's cooking.
- Spread butter over the entire chimichanga. Add a little bit of butter under the tortilla flap to help keep it closed.
- Spray the Microwave Toaster with non-stick oil spray on both plates.
- Place the chimichangas into the toaster and close it up.
- Cook it on HIGH for 1 1/2 minutes. Then, flip it over and cook for 30 more seconds.
- While the cheesecake chimichangas are cooking, mix up the 2 tablespoons of sugar and 1 teaspoon of cinnamon in a bowl large enough to toss the chimichangas in.
- Once the microwave is done, let the toaster sit for about 30 seconds before opening.
- Optional: Dip the cheesecake chimichangas in melted butter before the cinnamon and sugar mixture.
- Carefully add the cheesecake chimichangas, one at a time, into the cinnamon sugar mixture and toss to cover.
- Serve immediately.
- You can eat the cheesecake chimichangas immediately.
- Or, you can make a fancy dessert with a cheesecake chimichanga, a scoop of ice cream, whipped cream, and everything drizzled in dulce de leche sauce.
Nutrition Information:
Yield:
6Serving Size:
1Amount Per Serving: Calories: 169Total Fat: 15gSaturated Fat: 9gTrans Fat: 0gUnsaturated Fat: 5gCholesterol: 43mgSodium: 134mgCarbohydrates: 7gFiber: 0gSugar: 6gProtein: 2g
Any nutritional information on justmicrowaveit.com should only be used as a general guideline. This information is provided as a courtesy and there is no guarantee that the information will be completely accurate.
Loved this post? Follow along for more recipes at Facebook, Pinterest, Twitter, and Instagram!