Do you love cheesecake as much as I do? I’ve found a way to make plain cheesecake in the microwave in just minutes. Now it does need time to cool because cheesecake is best eaten when it’s cold.

But, this recipe for plain cheesecake is creamy and delicious and perfect for topping with so many things. Scroll down to see ways you can top this cheesecake for all kinds of variations!
Table of Contents
What ingredients do you need to make Plain Cheesecake in the Microwave?
- 1 1/2 cups graham cracker crumbs
- 7 tablespoons butter, melted
- 8 oz cream cheese, softened to room temperature
- 3/4 cup sugar
- 2/3 cup heavy whipping cream
- 1 tablespoon flour
- 2 eggs
- 2 teaspoons vanilla extract
How to make a Plain Cheesecake in the Microwave?

Melt the butter and combine with graham cracker crumbs.
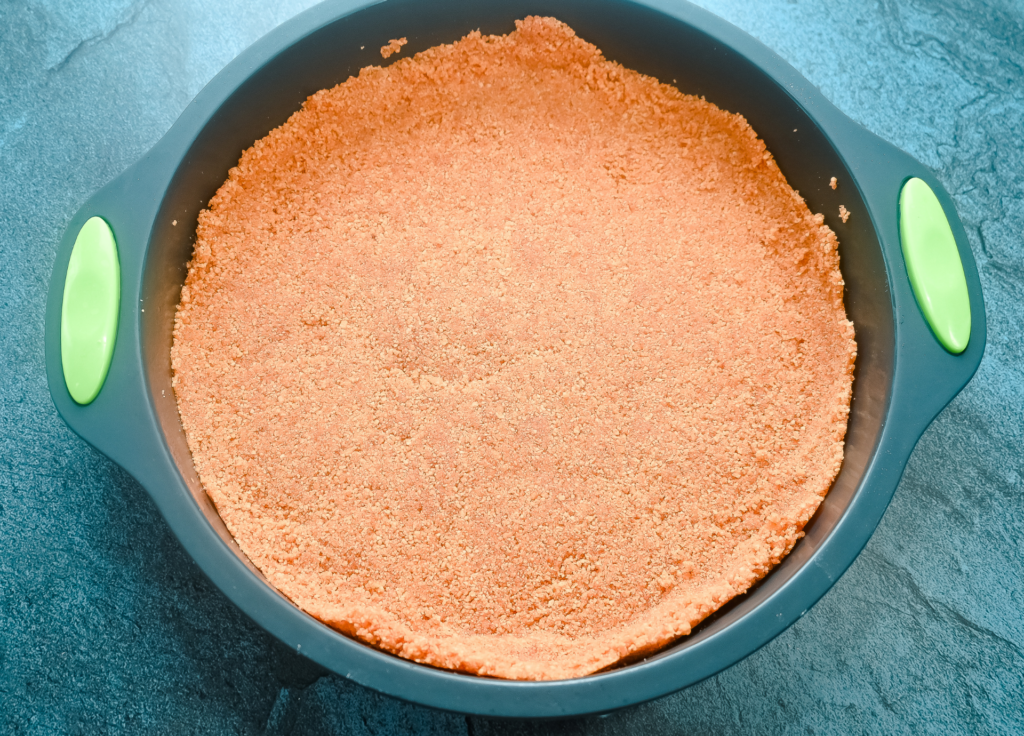
Spread in a microwave-safe 8 x 8 baking dish, porcelain pie plate, or 9-inch silicone cake pan. Heat for 1 minute in the microwave, then immediately place in the fridge while preparing the cheesecake batter.
Using an electric mixer, combine the cream cheese and sugar until fluffy.
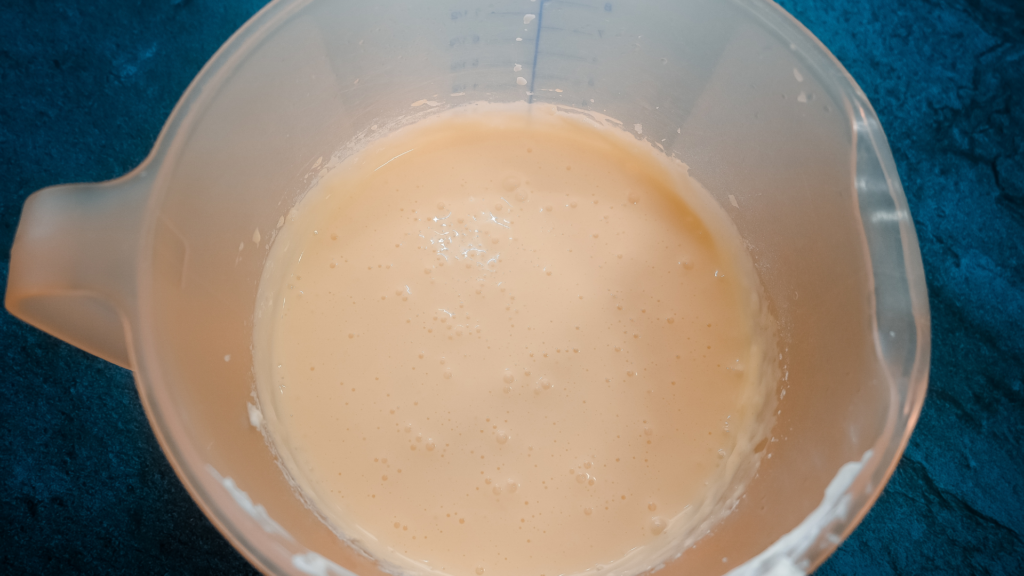
Add one egg at a time until each is completely incorporated. Add the vanilla, cream, and flour and beat until completely incorporated. Pour the batter over the crust in the microwave-safe baking dish.

Heat for 4 minutes on HIGH in the microwave, then check doneness — the cheesecake should be mostly set and just jiggle like firm jello. The very center should be the only part that is mostly jiggly.
I found with my 1000-watt microwave, it took about 6 minutes before it was mostly firm with a small amount of jiggle.
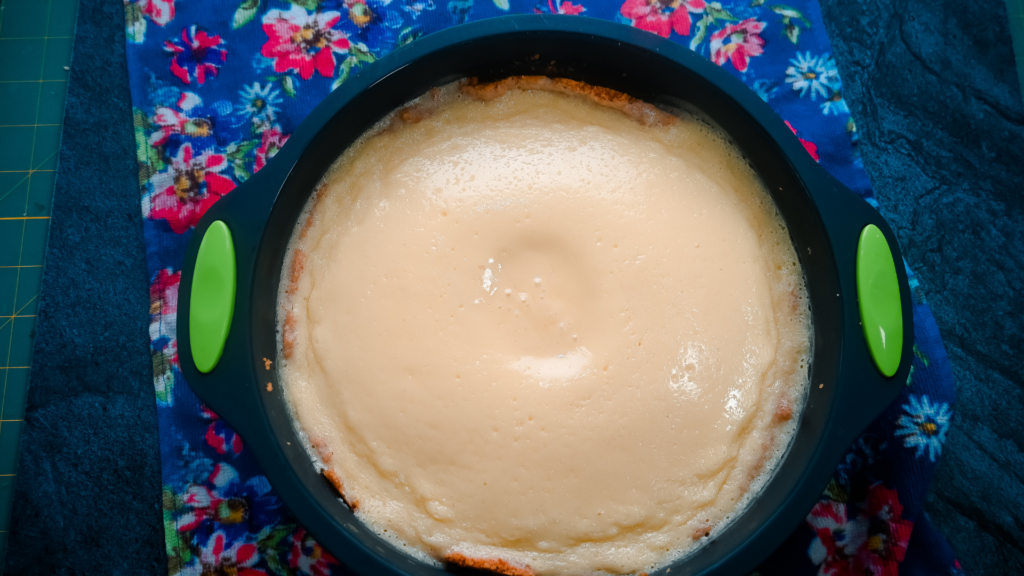
If it’s still very jiggly or runny, continue cooking in the microwave in 2-minute increments, checking for the jiggliness.
Allow it to cool for a few minutes on the counter before cooling for at least 4 hours in the fridge, preferably overnight.

What do you top Plain Cheesecake with?
I love plain cheesecake and you can top it with so many things. Here’s just a few ideas:

- Whipped Cream
- Chocolate Syrup
- Canned Pie Filling – Blueberry, Cherry, Peach, etc.
- Chocolate Ganache
- Caramel Syrup
- Magic Shell Ice Cream Topping
- Fresh Peach, Apricot, or Nectarine Slices
- Fresh Berries
- Fruit Compote
- Strawberry Syrup
- Frozen Sliced Strawberries
- Blueberry Sauce
- Strawberry Sauce
- Melted Chocolate Chips & Crushed Peppermints
How do you make Fresh Whipped Cream?
I make small batches of fresh whipped cream all the time. You can easily make it in a cereal bowl with a dash of sugar and 1/2 cup of heavy whipping cream and a handheld electric mixer.
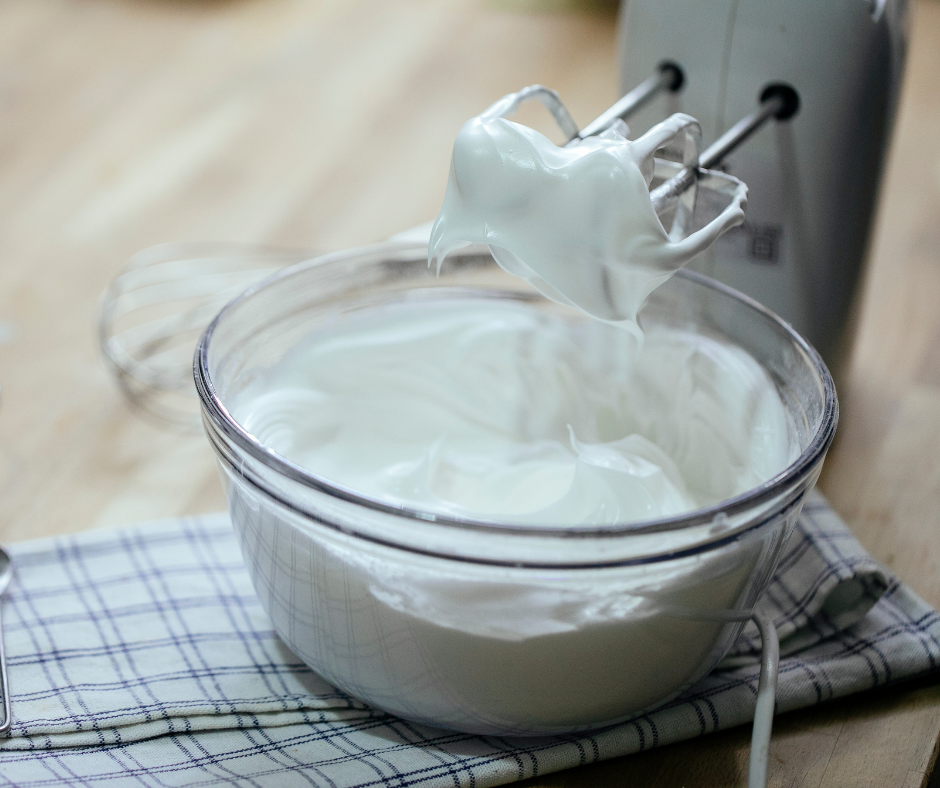
Just use an electric mixer or a hand egg beater or even a milk frother. Believe it or not, I use the hand egg beater more than anything to make a quick batch in just a minute.
How do you store leftover microwave cheesecake?
Because it contains cream cheese, store it in the fridge in a covered container for up to 3 days.
You can also freeze it for up to a month in a sealed container safe for freezing. Just let it thaw on the counter until it’s no longer frozen all the way through.
Can you make plain cheesecake in the microwave ahead of time?
I would definitely recommend making it the day before.
In fact, that’s what I do because I like to leave it in the fridge overnight to completely chill before serving. I find that it needs several hours to completely chill, and overnight it easiest for me.
More Microwave Desserts
- How to make Microwave Lemon Bars
- Chocolate Chip Banana Bread in the Microwave
- How to Make Microwave Monkey Bread
- How to Make a Microwave Cake
- Microwave Strawberry Upside Down Cake

Plain Cheesecake in the Microwave
Ingredients
Crust
- 1 1/2 cups graham cracker crumbs
- 7 tablespoons butter, melted
Cheesecake Batter
- 8 oz cream cheese, softened to room temperature
- 3/4 cup sugar
- 2/3 cup heavy whipping cream
- 1 tablespoon flour
- 2 eggs
- 2 teaspoons vanilla extract
Instructions
- Melt the butter and combine with graham cracker crumbs.
- Spread in a microwave-safe 8 x 8 baking dish or 9-inch silicone cake pan.
- Heat for 1 minute in the microwave, then immediately place in the fridge while preparing the cheesecake batter.
- Using an electric mixer, combine the cream cheese and sugar until fluffy.
- Add one egg at a time until each is completely incorporated.
- Add the vanilla, cream, and flour and beat until completely incorporated.
- Pour the batter over the crust in the microwave-safe baking dish.
- Heat for 4 minutes on HIGH in the microwave, then check doneness -- the cheesecake should be mostly set and just jiggle like firm jello. If it's still very jiggly or runny, continue cooking in the microwave in 2-minute increments, checking for the jiggliness.
- Allow it to cool for a few minutes on the counter before cooling for at least 4 hours in the fridge, preferably overnight.
Nutrition Information:
Yield:
8Serving Size:
1 sliceAmount Per Serving: Calories: 421Total Fat: 30gSaturated Fat: 17gTrans Fat: 1gUnsaturated Fat: 10gCholesterol: 124mgSodium: 265mgCarbohydrates: 34gFiber: 1gSugar: 24gProtein: 5g
Any nutritional information on justmicrowaveit.com should only be used as a general guideline. This information is provided as a courtesy and there is no guarantee that the information will be completely accurate.
Loved this post? Follow along for more recipes at Facebook, Pinterest, Twitter, and Instagram!